=[Return To Affluent Peasant Home Page]=
Country Living Journal
Surviving On The Frontier
=[How to Search This Page]=

Introduction
I'm writing a journal/report on what's happening on the land at different times of the year so people interesting in country life can have a view of what it takes to live in the country on the land, growing food and cutting firewood. The idea
is to supply the basic information of what is happening in each season so
people moving back to the country or starting out on the land will have and idea what to expect. It is also an historical record, a kind of almanac that can be searchable by months (01 = January, 02 = February, etc.) or topics like peas, tomato, wood, electric, motor, etc.
So far we have spent over 25 years living on the land and in many ways we are just getting it down right. So to save you some time and many mistakes we are presenting this journal.
How To Use This Journal Of The Seasons
There are two basic ways to search this journal: first, you can search by key words ... to find about beans, weeds, corn, and you will find each reference to that topic as they occured in the season. For example, if you searched for tomato, you would first find references to storing tomatoes because the journal starts in winter (January). More searching for tomato will bring you to starting transplants, and move through the season with each new reference to tomato in the search. In effect a handy guide from planting to storage.
The next method to search by is by date. If for example you wanted to find what was happening at a particular time of the year, you could search by date. Each date is in a form of mm-dd-yy
Note: only some dates are listed so try and search for a particular month, not a day. You could for example search for March by searching for 03.
=[Click Here to Find How To Search This Page]=
Continue Scrolling Down This Page To See Journal Entries Or Use Your PageDown Key
Jan 6, 2002 Sunday
It's snowing here. We have about 8 inches on the ground and the snowmobile
trails are pretty good.
Sunday is the day to make the work schedule for the week. Normally at this
time of year cutting firewood for next year is the main project. This year is
different because the big winter project is building a workshop. In
anticipation of this project, we have been cutting extra firewood each season
for the past few years. There is now about a 3 year supply of wood to burn. A
years supply here at the cabin, a years's supply stacked at the new house
site, and about a years supply cut to stove length and laying in the forest
from last years cutting.
The supply of wood next to the cabin is nice and dry. Normally we would be
cutting new green (undry) wood and bringing to stack next to the cabin to dry
for next season. This year, the extra wood that was cut but not stacked in the
forest will be brought in and stacked next to the cabin to dry for next
winter.
Before undertaking a major project like building, you need to make sure that
you have set up all the support systems that will be needed during the
building. A very important part of working in the country is your support
systems. If you run off and start work on a big project without carefully
setting up all the support systems that you will need to keep the project
going, you will soon find yourself falling behind in your work. For example,
if weather conditions are good and you work a little late on your building and
you come back to have supper only to find that you have no wood ready for the
night fire and nothing prepared for an easy to prepare supper then you have
set yourself up to be behind schedule for the following day.
In the old days the jobs done to maintain the basic support systems were
called chores. In the winter, an essential chore is having a continuous supply
of firewood ready for the stove. This job requires advanced planning because
you need to let your wood dry for a full summer before burning, so unless you
have made a surplus (like we have now) you will be cutting and moving next
years supply of wood in, to be ready for next year. Each day you will need to
make sure you have wood split and moved indoors to be ready for the day and
night fires.
This season we will have a lot less work to do because the wood is all cut to
stove length piled next to the snowmobile trails for easy pickup. We use a
snowmobile to move wood from the woods to the house. Some people use tractors
(which need wide roads), pickup trucks (need well maintained roads), horses
(horses are a whole job in themselves), or you can pull wood in on a tobogin
(good exercise but a lot of work). We have found using a snowmobile is a
really good method, because the snow makes moving even heavy loads of wood
relatively easy. The snowmobile trails do not damage the forest or rip up the
soil and cause erosion. With so little friction moving up to 500 lbs of wood
(1/4 ton) in one load is possible under ideal snow conditions. This setup uses
fuel efficiently and has the added bonus of being fun to do. Bringing wood in
is like driving your own snowmobile train through senic trails through your
forest and back to your house. A outdoor job to look forward to.
Snowmobile Sled Firewood System Home Page
During this year's wood season we need to bring in at least as much wood as we
burn each day. So some days we will move extra and other days we may move
none. The cut firewood is near the building site, so each day on the return
trip from working at the site a load of firewood can be carried back to stack
here for next season.
Each day wood has to be stacked and moved into the house to feed the stove.
Sometimes a 2 day supply can be moved in so that you can have a day off from
moving wood in the following day. In this way, the basic support system for
keeping the fires going all winter are maintained.
The next major support system is food, for keeping the fire within your body
going. If you plan on doing any amount of physical work you need good food and
plenty of it. Skimping on meals will lead to tiredness, inattention, and
accidents. You need to have all you meals setup in advance, so when you come
home from the building project you can have a good meal ready in a short time.
The lumber camps in the old days had their own full time cooks keeping
everyone well feed. We have to plan ahead and set aside time each week to
prepare as much food as possible ahead of time. A real main stay out in the
woods is the stew. Potatoes and carrots from the rootcellar are cut up with a
veg-o-matic cutter (thanks, ma !) into soup size squares and added to tomato
stock with some spices and cut up chicken. Right now you can buy a big package
of chicken thighs that will make a whole weeks supply of stew for about $3
worth of chicken. Boil the thighs, cool down the pot (covered out doors) and
skim off the fat (give to the chickadees) and take off the skin, bones, and
cut the meat into the stew.
A stew will actually taste better as the week goes on (keep refrigerated
outdoors), you can add to it as the week goes on to change the flavor and
create more variety.
Normally, we also have a big batch of corn bread to go with the stew, but, due
to a change in our electrical system, the grinder is not setup to grind the
corn yet. The stew and the corn bread provides the basic diet and other
vegetables like, squash, beets, cabbage and carrots (shredded like cole slaw,
but with salad dressing instead of maionaise), all add variety.
When you begin a new big project, like a building project, it is a very good
idea to go through all your support systems and develop a schedule of chores
to make sure your project does not take over and lead to a collapse of your
whole work system.
So for this week, the wood supply system is moving into operation, the food
prep chores will probably be done during a special work day each week devoted
to maintainance. In addition, this week, all the places where things tend to
accumulate (near the sink, the desk, etc.) will be studied to find ways to
have special boxes to store things out of the way, but close enough to be
accessable when needed. This week will have special focus on how to improve
all support systems, and have them geared up to be able to function well
during the building project.
Meanwhile, the building project itself is at stage one. The foundation is
ready to build on. This was completed just in time before the ground froze.
This week we will focus on building up and perfecting all the support systems,
and begin collecting together tools that will be needed when building gets
under way.
Part of this preparation will be putting a new bar and chain on
the chain saw and tuning it up to be ready to cut the lumber to size for the
building of the workshop. Spending time on careful preparation will avoid the
pit falls of focusing too much of your work on the building project, while
your support systems slide.
ASSIGNMENT THIS WEEK: Go through all support systems and improve any
weaknesses. Get set up to have an efficient support system ready to keep the
building project going. Begin gathering and repairing all tools needed for the
building project and tune up and get a new chain and bar on the chain saw.
Weather forecast look good for working, not too cold or windy, cloudy to
partly sunny. Outdoor jobs will be scheduled around the best weather
conditions.
Jan 13, 2002 Sunday
Last week we decided to focus work for the week on basic support systems (like
firewood and food preparation) so we could get things ready for the building
project. Once the projects for the week were decided then the next step was
to decide how to schedule jobs during the week.
3 ROLES: Boss, Foreman, Worker
When you work for yourself, you have 3 roles to play. Your first role is the
role of the boss or director of your operation. This is a management role and
it involves looking at the big picture. What needs to be done to accomplish
the goals of your operation. In this case the boss decided that maintainance
systems needed to be functioning smoothly before taking on the special
building project. The second role you need to take on is the role of a
foreman. A foreman gets the jobs for the day or the week and is in charge of
getting the workers to carry out the work. So in the present case, let's say
the foreman has gotten the job assignments for the week. Being a person who
works in the field, he (or she) is in touch with the practical limitations of
carrying out jobs. So we will leave to the foreman the scheduling of the jobs
assigned and making sure the jobs are carried out by the workers. When living
in the country, you are often the boss, the foreman and the worker. Many
people find they are much better at one of these roles than another.
For example, some people are fantastic workers. Give them a job and they get
right into it and do it well, but they have a hard time seeing what needs to
be done. Others see the big picture and have a good view of what needs to be
done (great boss) but have few skills to carry it out. And most people need
work in the role of foreman. The foreman is a worker who has to find how to
carry out the vision of the boss while working with the real life limitations
of the situation and developing a good relationship with the worker. For our
purposes we will assign the job of scheduling to the foreman, because he has
experience in the practical aspects of jobs. Now anyone who works for themself
needs to be able to develop skills in all three roles: the boss, the foreman,
and the worker. A balance in all these roles is essential for getting work
done and enjoying the process of work.
Once you begin working for yourself you feel the weight of the responsibility
of the job and if you are not careful you can become a very demanding boss. If
you are new to being your own boss you can easily fall into the attitude that:
this needs to be done and it needs to be done now! Take a little time to stand
back from the situation and relax. Cracking the wip is not going to endear you
to your foreman and the worker. Since you will be on the receiving end of this
attitude down the line as you take on the role of foreman and later worker, it
is best to nip this attitude in the bud. Remember your job as boss is to see
the directions you want to move in and hand the jobs off to the foreman and
the worker without dumping so much on them that they decide to quit or go on
strike.
Now that you have set out the jobs that need to be done. Let the foreman work
on coming up with a tentative schedule for the jobs that need to be done for
that week.
Once you get the assignments for the week in your role as foreman, the first
thing to do is check the weather forecasts for the week. If you have access to
the internet you can download and print out the forecast directly from the
weather bureau. In the country, weather rules. It is far too powerful a force
to fight or ignore. Work with the weather and you can save yourself a lot of
work. Let's take last week for an example. The beginning of the week was
forecast to be cloudy to partly sunny with high temperatures just below
freezing. The forecast for later in the week was for warming temperatures and
possible rain.
First, you have to consider the worker. No one enjoys working in uncomfortable
conditions, and working in the rain just above freezing temperatures is not
something anyone looks forward to. So the first scheduling decision was to
save indoor work for the days late in the week when it could be raining. Since
moving wood in from the forest was an important job assignment for the week,
in your role as foreman you would have to decide what conditions were best for
moving wood. For best results, trails need to be frozen and hard packed to
carry the weight of the firewood in the sled. Temperatures just below freezing
especially if not too windy are ideal conditions for moving wood.
The key to working outdoors (especially in the winter) is dressing properly
for the conditions. You want to stay warm while you work but not so warm that
you sweat. Once you start sweating it is just a matter of time before you
start feeling cold. So you dress in layers. The temperatures were just below
freezing, with moderate work like loading wood into the sled and then driving
the snowmobile back to unload, dressing light would be the best appoach.
DRESSING WARM
If your feet get cold you will not be concentrating on your work but instead
thinking about getting the job over with. That is not the way to work. So
first you need warm feet. In general, with temperatures just below freezing 2
pairs of cotton socks (or a pair of wool socks) inside of rubber farmer boots
that fit loosly and come up to just below the knees is a good bet. Use heavy
leather work boots (one pair of socks if lined) if you are using a chain saw
or other equipment.
Next, one to 2 pairs of long underwear under your jeans. A light shirt, is
covered with a light sweatshirt with a hood. Make sure the sweatshirt is long,
get it too big and stretch it to make it long if you need to. A long sweat
shirt will not ride up your back and expose your back when you bend over. Be
sure to remove the string from the hood on the sweat shirt so you will not
have a string dangling around machinery (like the snowmobile engine, or a
chain saw), as a string can catch in any rotating machinery and choke you
before you have a chance to react. For the same reason never wear a scarf.
However you do need a scarf substitute. Something that looks like a turtle
neck on a sweater can be bought that will fit around your neck like a sleeve
and keep the cold out is very important for maintaining your feeling of
warmth. Cover this with a good light nylon parker with a zipper so you can
open and close it if you get too warm or cold. A long neck on the parker is
also a big help if you need it. The parker blocks the wind and allows you to
adjust the zipper to control the heat as you work.
You need a good pair of leather work gloves with cotton liners. Be sure to dry
the gloves and liners after each use. The real key to staying warm is a hat. A
great deal of heat is lost through you bare head (that's why you have fur on
top of your head!). A duck bill hat with the visor in the forward position
(yes, that what visors were designed for) helps keep the sun out of your eyes.
A pair of 100% UV resistant sunglasses is essential to prevent eye strain and
later headaches (especially with the glare and reflection from all the snow).
Use it on cloudy days too. This will also help to prevent cataracts in your
later years. Then top off the whole thing with a sock hat. The hat is pulled
down over your ears if you are cold and pulled off your ears as you get warm
(your ears are good radiators) and can be removed if you overheat but keep it
handy to put right back on. With this setup, you should have no discomfort, it
should be as pleasant as working indoors.
Now are ready to work outdoors. With temperatures just below freezing with
very little wind, the trail conditions are good for moving wood, so in your
role as foreman you tentatively schedule moving wood jobs for the beginning of
the week and save all your food prep jobs for when the weather warms and rain
is more likely.
Moving wood was the main job early in the week. As the weather warmed and it
started to rain, work on making large batches of soup, corn bread, and
carrot/cabbage salad became the major jobs. Starting with grinding the corn.
Thurday looked like a day for rain all day, that day became the town day. Town
days are a combination of work (getting a few supplies, any hardware needed
for projects) and time to visit with people you know in town. The day
following town was still cold and rainy, so it turned out to be a good day for
baking a second batch of bread and doing some planning. Weekends are taken off
except in emergencies. Saturday is a kind of hobby work day where you can work
on projects that you want to do that are not of high enough priority to be
considered jobs by the boss. Sunday is a visiting day and time off to read or
go for walks. Sunday is also scheduling day. Get the lastest 5 to 7 day
forecast for the week and begin get a rough schedule for the week.
This week looks like the beginnig the week will be like last week. Just below
freezing and a good time to move wood. The tentative schedule had planned on
working more on building this week, but the weather has been unusually warm
across the country so it looks like moving wood as much as possible while the
trails are still here (before the snow melts) will take priority over starting
on the building project. If more wood is moved now less will have to be moved
while working on the building project, so this is actually going to give more
time for building later.
Scheduling around the weather made a big difference this week. If we had
not taken the long range forecast into consideration, we may have worked on
food prepartion early in the week and have been forced to work on moving wood
in the rainy weather on soft trails. Not only would that have been a real
unpleasant experience for the worker, but it would have forced us to take
smaller loads of wood on the soft trails. We would have moved less wood, under
more unpleasant conditions, and done considerable damage to the trails that
would have left us with poor trail conditions for this week.
As it was, with good scheduling, wood moved in under good trail conditions,
little damage was done to the trails, and the outdoor work condtitions made
for an enjoyable experience. In addition, it was a great comfort to be working
on extensive food preparation, warm indoors while it was cold and raining
outside. The town day took advantage of conditions that were totally
unfavorable for working outdoors. Careful scheduling made for an enjoyable
work week were a lot of important things were acomplished.
02-20-02 Sunday:
We moved a good deal of firewood in last week, and began clearing an area of
snow to set up to work on the building project. A good schedule of working on
basic support systems was set up and work will begin to focus part of the time
on the building project. But before we look at the project of building a
workshop, let's look at the concept of work in the country.
What Is Work?
Looking back to the old days, most people worked for themselves on their land.
Some times people would "work out" on "day labor" at certain times of the year
to get some cash to get some town goods. Day Labor is where you hire yourself
out for the day to work for someone else to do the work they want done and in
exchange they would pay you either cash or goods for the work you do for them.
Today most people work as day laborers, they "work out" doing work for other
people in exchange for money. They then use the money to buy the things like
food, heat and shelter that people used to provide directly for themselves.
Most people in town take "day labor" jobs and have little experience with
the day to day work that people who live on the land in the country have done
for generations. In fact, looking back on history the present culture of so
many people working for other people is really recent. Though out most of
written history, probably 80 to 90% of people worked on land to directly
provide for themselves their basic needs. They supplimented this work by
selling extra produce to those who lived in town or took part in occassional
day labor jobs in exchange for goods, services or cash.
If we look even further back, before agriculture (before about 10,000 years
ago) everyone was directly involved in providing for their survival. During
this hunter/gatherer stage of development, small family units varying in size
from one family to a group of related families (tribes) moved from place to
place gathering wild foods and hunting animals for meat. Each family could do
all the crafts necessary to survive in the climate they lived in. From
gathering and processing food, to making all their clothes and tools from
skins and rocks. Almost everyone in their culture had the same skills. They
shared the same cycles of gathering and hunting. When the berries were ripe in
certain areas, they came together to gather them. Their work was the daily
tasks of gathering together the things they needed to live.
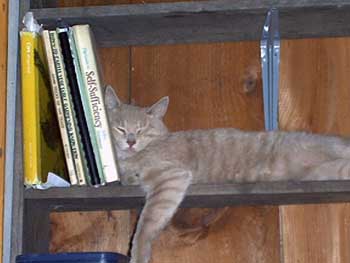
To get a better idea of the nature of work during the preagricultural phase
let's take a look at the cat. A cat is a predator. The work of a predator is
to catch it's prey. You catch a small rodent and you eat enough to live
another day. I am sure that any one who has seen a cat hunt, is strongly
impressed with how totally involved the cat is in the hunt. A little stirring
in the leaves and the cat is engaged. Slowly step by step the cat moves
towards the sound. Every move carefully controlled. As the cat gets closer to
the mouse, you can see the excitement rise. The the pounce and the scramble to
catch the mouse. Oh what fun for the cat! Cats absolutely love catching mice.
Every fiber of their body is tuned to catching mice. They catch mice even when
they are not hungery because they just love all aspects of catching. They will
even run after paper balls, with the same satisfaction. It is the nature of
cats to love to catch things.
 Let's take a look at how cats came to love catching things in order to get a
better idea of the nature of work. Cats have been selected for thousands of
years on one standard. If you catch plenty of rodents you live if you fail to
catch enough you die. Cats who loved the processing of hunting lived to
produce more cats who loved hunting. During hard times only those who loved
hunting and developed even more sophisticated skills in this craft lived to
produce more cats. This process produced a race of cats that lived and
breathed hunting, they loved every aspect of it and enjoyed developing all the
intricate skills in their craft. In fact, as cats improved in their work they
found easier ways to catch mice. They knew where they hide and when they came
out. Smart cats spent less time looking for mice because they knew where to
look.
The more you loved to hunt, the better you became at it, the less time
you had to spend in the process of getting food and the more offspring you
could raise successfully. Once this process starts you just keep getting
better and better. (See cat relaxing after the hunt.)
Let's take a look at how cats came to love catching things in order to get a
better idea of the nature of work. Cats have been selected for thousands of
years on one standard. If you catch plenty of rodents you live if you fail to
catch enough you die. Cats who loved the processing of hunting lived to
produce more cats who loved hunting. During hard times only those who loved
hunting and developed even more sophisticated skills in this craft lived to
produce more cats. This process produced a race of cats that lived and
breathed hunting, they loved every aspect of it and enjoyed developing all the
intricate skills in their craft. In fact, as cats improved in their work they
found easier ways to catch mice. They knew where they hide and when they came
out. Smart cats spent less time looking for mice because they knew where to
look.
The more you loved to hunt, the better you became at it, the less time
you had to spend in the process of getting food and the more offspring you
could raise successfully. Once this process starts you just keep getting
better and better. (See cat relaxing after the hunt.)
Now how does this relate to the concept of work? Let's put it another way,
does a cat work when it hunts mice? Can you call something that a cat enjoys
so much, work? When a group of kids go out on Saturday morning full of
excitement and enthusiasm to build a tree house, is that work? What is the
difference between work and a hobby?
The real key to this concept of work is, do you love your work? If you are
doing work that you love, like the cat hunting, the kid building a tree house
then you are doing what has been natural for people and cats to do for
centuries. Natural work has an inherent reward for people because we were
selected and tested for many thousands of years for people who liked to work.
Those who could develop essential skills, those who learned well from those
who knew the essential crafts lived full lives and left many decendants. We
have spent most of our development as a species selecting for people who loved
to do those things that were needed for their survival. All measure of success
as a species was measured against the yardstick of how well we were able to
provide for ourselves. If you loved your work and grew in your level of skill
then life was a bounty.
Ever been on an easter egg hunt? What fun it is to search around and find
things you can eat! What a thrill! If we look carefully at this activity we
can see something of our heritage as humans here. We love to gather food.
Berries, apples, nuts, seeds. Find them, collect them, make big piles of them,
store them for later. We have been doing that for thousands of years and kids
still love to do it. Just like the cats we have certain things that we love to
do because we need to do them to live.
Let's take sports. Many people have a passion for sports. They love sports.
Many men love sports. What are some of the core experiences in sports that
excite people? Where do they come from?
One of the core experiences in any sport is team work. A team must work
together, so that each memeber can fill in where needed, cover for his team
mates, help each other out. Looking back in time to our hertage as hunter
gathering tribes, it does not take long to see that those tribes (teams) that
worked well together ... that loved to work together, did really well at
survival. Men hunted in teams, they developed strategies to anticipate their
preys next move, and they developed skills that made them important members of
their communities because they provided food. The intense loyality of sports
fans for their teams is an outgrowth of our thousands of generations of tribal
living. Team work was the basis of human hunting strategies, especially of big
game hunting during the ice age that proceeded agriculture. Sports are often
an acting out of activities that we love to do. Many sports target things: Hit
the moving ball, throw the ball into the hoop, catch the ball. Targeting is a
key behavior in hunting. Just like hunting skills, the skills in targeting
balls, is a skill that we love to do and one that improves to almost mystical
levels with practice. The skill development in a sports team has to rival
those of our early ice age ancestors. It is in our blood. We love it.
So what sports show us is that if we can not do the natural work we have done
for generations, then we will make up things to do for fun that involve many
of the same skills. We need to belong to a tribe, we need to run and move, we
need strategy, we need goals, and we need to see some measure of success in
our work.
So when we look at work from this point of view, we realize that day labor
jobs are really an unnatural way to work. Something we never really spent much
time doing in the past and something that we are really not designed to enjoy.
That is not to say that you could not find an wage job that you enjoy, but it
is much more likely that we could find work that we love to do by doing the
kind of work we did during our past. Cats love to catch mice, but they can
live in a house and eat cat food. But if they do then they will create sports
like chasing paper balls.
So the key to work in the country is that we have the distinct advantage of
doing the kind of work that we have been selected to love doing for many
generations. At first as hunter gatherers and later after agriculture as
farmers.
After farming became widespread, the collecting, gathering, growing aspects of
our work became more important and the hunting skills focused more on hunting
as a sport, or sport as a supstitue for hunting. So we are not really
comfortable yet with agriculture because it is so recent in our past. But it
does have a core of work skills that we love to do. So with this knowledge
that we have matured as a species for eons of time in a love of basic core
work skills then we can look at the work we do living on the land in the
country as a very natural extension of what we loved to do in the past.
And in this way we can overlook and understand why many of our city neighbors
take a dim view of the work at day labor that they have to do. Moving boxes,
or doing the same thing over and over again. No wonder the highest idea of
many in our modern culture is to win the lottery and never have to work again.
Out here work is not something you have to do it is something you want to do.
Like, let's build a tree house.
Ok, so now we see that with our rich history of work in providing directly for
our needs, we can find ways to connect into this love of work as we go about
our business of living in the country.
Current Job: Moving Firewood In From The Forest
Moving wood in can be a fun job. Just like the easter egg hunt, you have piles
of things to collect. Although you can't eat wood, it sure is nice to have a
large supply of it sitting right next to your house when it gets really cold.
I remember when we first came to the land. We set up a cabin just before the
snows fell and had little firewood on hand for the winter. There were a number
of big old (and dry) dead elm trees that had died from the dutch elm disease
that swept through the country back then. Each day we got up, went back to
those dead trees, cut them up and dragged them back with snowshoes and
toboginns back to the cabin for heat. Each day we did the same thing: get wood
to stay warm. We knew exactly why we did this.
Imagine it is cold, I mean really cold, like the time we had minus 48 degrees
F below zero. I mean that was really cold, so cold it could take your breathe
away. You needed a snorkle hood to travel outdoors. It was so cold that the
trees were "popping". Trees popp when it gets so cold that the wood shrinks
and the tree actually splits up the side of the tree. The popping sound of
this split is so loud that is sounds like a gun shot. You could hear trees
popping every few minutes in the forest when it got really cold, especially if
it was really cold. Back in those days in the winter our road was not plowed.
So you could stand out in the cold, knowing that you were miles from the
nearest road, hear the trees popping, feel the bitter cold, and know that the
wood in your stove was all that kept that bitter cold from taking all the heat
from the core of your being. At times like that firewood became way more
valuable than any amount of gold. It was life itself.
With that insight, you really can't help but enjoy picking up piles of wood
piled by the snowmobile trail and loading them in for the ride back to the
cabin. It's like picking up blocks of heat. In fact, what you are picking up
is all the heat that those particular trees absorbed as they soaked up the sun
of the summers when they grew. The trees we are collecting now were trees that
were damaged in the recent ice storm, so in the summers before that storm they
soaked up many sunny days and that heat is all held in that wood. When the
wood goes into the fire the sun's heat from all those summers of sun radiates
out into the room. Truely summer heat in the winter. And we you come in from a
day of moving wood there is nothing like cranking up the stove to heat the
room to feel like those summer days: like 80 degrees, like 90 degrees, or if
you really need a tropical minivacation, crank it up to 100 degrees and soak
up some rays by the stove in a dry sonna. If you have a wood stove and a good
supply of wood (and a good safe chimney ... metal insulated chimney being the
best) then you can be "perfectly" warm in the winter and create a tropical
climate whenever you need a break.
So back to the job at hand, picking up wood. As you can see, picking up piles
of wood does not have to be not any more work than picking up money off the
street. But to keep this work enjoyable you have to be careful how you pick up
your treasure. Wood is heavy. So you have to develop good work habits, so you
will not strain your back and so the exercise you get in moving wood is
enjoyable and good for you.
The wood is piled close to the snowmobile path, so rather than standing up and
bending over the wood to pick it up to put in the wood box sled, we put a
couple of empty feed bags down on the snow next to the pile. You want to be as
close to the pile as you can so you will not have to reach too far. Knee down
on the bags so you knees will not get wet and cold and then reach out and roll
a piece of wood off the pile close to you. Pick it up, close to your body
without bending off center and push it up as you would a basket ball and let
it drop into the wood box of the sled. Good exercise for your arms. Get a good
rhythm, and develop some of the same skills as in basket ball, after a while
your arms sense the weight and everything flows. When the box is full hop back
in the snow mobile and cruise along the senic trails back to the wood stacking
area near the house. Wood on top of the box is easy to pick up standing next
to the box and stack along the wood stack next to the trail. After some
practice, you can load wood in the box so that the wood on the bottom of the
box is standing on end, this makes it easy to pick out of the box without
bending over too much when you stack the wood near the house.
Stacking wood is really kind of a sport. At first you need to look at each
piece of wood to size it up. Usually one end may be a little wider than the
other and you need to even out the stack, so as you stack your wood you need
to keep the stack straight so it will not fall over later. It is very much
like the old craft of building a stone wall. At first, you may have to think
about where to put each piece, but then with experience you find you hands
automatically put the piece right where it needs to go. Evening out the pile
is like shooting baskets. They just go right where they need to. In fact,
after enough practice, you find you have time to think about other things
while you stack, and let your hands doing the stacking for you while you think
over a few things. Stacking wood, once you get the nack of it is a kind of
meditation. Time to think things over and see your wood pile grow. A kind of
interesting hobby that some people call work.
01-29-02 Tuesday
The early part of last week was cold and the snowmobile trails were in good
shape so the highest prioriy was moving firewood in order to take advantage of
the trail conditions. The snow is now only a few inches deep and any serious
rain or extended warm wind could melt the snow completely, so it is important
to move firewood whenever the trails are firm.
The extended forecast for last week was predicting warm but non rainy
conditions for thursday and friday, so the original plan was to focus work on
building on those days. As it turned out it rained thursday, so the town day
was moved to thursday, and work on the building was rescheduled to friday and
saturday. Normally weekends are off but under the pressure of tight weather
conditions, saturday was changed to a work day.
A lot of progress was made on the building project. The foundation blocks were
setup in the fall (before any possible freeze of the ground), and the sills
were mostly completed during the work friday and saturday. The work site was
then covered in plastic to keep the lumber dry during the warming and possible
rain conditions forecast.
Although 5 day forecasts are generally pretty good, last minute adjustment
often have to be made. For that reason it is often very helpful to save jobs
that could fill in if conditions change. Saving the town day for later in the
week, can fill in for work on a rainy day or can give a semi day off if you
are finding yourself over worked.
The building project has special scheduling needs. This week the floor is the
focus of work and we have to be very careful not to allow any water to get on
the lumber. Water can not be sealed in the floor during construction, so only
days with no possiblity of rain or wet snow can be scheduled for work on this
project. Conditions on monday this week were warm and dry, so all the lumber
for the floor structure was cut to size. Today tuesday, is warm and rain is
possible so it is better not to uncover the floor until conditions improve.
Tomorrow, wednesday looks like it might be dry enough for some work on the
floor. Long range forecast show more rain/snow/freezing rain for thursday and
friday AM with a possible break on saturday and sunday. So wednesday will
probably be used to get the floor ready for the next step to assemble the
underfloor and add insulation and cover with vapor barrier top with the 3/4
inch plywood floor on friday afternoon and saturday. Sunday will be a work day
if needed. The plan here is to have at least 2 days to get the floor completed
and closed in while there is little chance of rain. Once the floor is enclosed
then it will be covered with plastic and a tarp to insure that there is no
water damage to the plywood floor and the insulation. Jobs like this have to
be scheduled in groups of days because the project needs to be completed to a
certain point (completely enclosed floor) before a change in the weather.
Today is a catch all day, where a lot of small jobs can be done to fill in and
be ready for the next phase of work. For example, I am looking for shims of
various sizes to put between the foundation and the sills to level out small
differences in the lumber. I did not have time to write this journal entry on
sunday because that was my only day off last week. I have a neighbor who wants
some firewood moved to their house from a distant wood pile, so I can move
that wood for a little extra cash today if I have time.
I have another neighbor who has hired me to cut some trees to make room for an
electric fence around their garden. I am saving this work until later in the
winter, but if I need extra cash I can start on this work in between other
work. Cutting trees does not require good trail conditions and can be done
even if the snow melts. So scheduling involves many layers and in ways you
need a general plan for the whole winter as well as each week.
Work on building the workshop is challenging. Your start with a general plan
of how to construct the building, but as you go along you may decide on
improvements. Now, while working on the floor, I am starting to look at the
whole design of the workshop so that I will have a good idea what I want for
the windows. The walls will be built on the floor and assembled after they are
made in sections. So decisions of the general layout of windows need to be
finalized soon. I am thinking of making a truss across the whole south side of
the workshop with only one support in the center of the wall. This will allow
the entire south wall to be some form of windows. At first, the entire side
above waist height could be closed in with plastic and later windows could be
added as we get a better idea of where windows are needed by using the
building for a while before the final decision is made. The west side of the
north wall will also be left open for windows in this plan. The area on the
north wall on the east end will be fully closed because that is the area
will the wood stove will go. Designing a certain amount of flexibility in the
building is very helpful because no matter how much you work on design, there
is often times when you will like to make changes based on how you actually
use the building. Some areas like near the stove will have no changes while
other areas like the south side will be more likely to change with use.
Work on the maintainance systems has been going pretty good, so far. But if
the weather stays warm and wet then we may have to skimp on maintainance if an
opportunity for work on the building comes up. Catch up on maintainance can be
scheduled in after we take advantage of good building condiions. The reason
for this is that the workshop has to be fully enclosed and the exterior mostly
complete BEFORE work on the gardens start in spring. Sometimes the soil is
tillable as early as mid march, so building will have to have an increasing
priority as time goes on. So far progress has been pretty good, even with
limited weather conditions.
02-04-02 Monday
This has been a very challenging week with scheduling around the weather.
Building is at a critical stage, no snow or rain can get on the lumber that
will be enclosed in the floor because it would be trapped inside could cause
moisture problems. Monday was clear and cold, so work was started early and
lasted right up until dark. All the floor joists were cut to length, corner
supports were added, and foundation was shimmed to level. Tuesday had
scattered snow showers so the work site was left covered and work was done on
other jobs. Wednesday was cloudy, cold and snow free, so work was started
early and lasted till dark. The spacers were carefully cut to tighten the
floor, all floor joists were nailed in place, and all except a few spacers
were put in place. A large winter storm, 6 inches snow with mixed snow and
freezing rain moved in Thursday and Friday. Saturday was sunny and cold, so
the remaining spacers were added and work on the subflooring (underneath the
floor joists to keep the mice out) was started. This work involved being
underneath the floor nailing up overhead, so the work was somewhat difficult.
Work progressed from early morning to dark, with half of the subflooring
completed and everything was set up for a quick installation of the remaining
sections of subflooring. The forecast was predicting clear conditions for
Sunday morning, but it looked like snow would begin earlier, so the site was
covered with a tarp in addition to the normal plastic cover to protect the
subflooring that was already installed from moisture.
Normally it is a good policy to take weekends off, so you do not get
overworked. Given the fact that it was been snowing almost every day, it was
decided to plan work around the weather and work right through the weekend if
needed until the floor is closed in. Today Monday, is snowing again, so today
is a kind of day off to make up for working Saturday. The forecast this week
shows cold air moving in tonight and clear conditions tomorrow morning with
snow in the afternoon, with possible clearing Wednesday morning and snow in
the afternoon. The plan this week is to work on finishing the subfloor on
Tuesday before the snow in the afternoon and hopefully to make some progress
on insulating the floor on Wednesday before the snow in the afternoon. If
there is enough time, the plan is to get the subfloor in, insulate the whole
floor, cover with a vapor barrier (6mil plastic) and lay on the plywood. If
conditions do not allow all of that then we need to be ready to cover and
protect the job for the time I plan on being downstate for a visit.
Covering the floor is an important operation, as no moisture can get in the
floor because the floor will be sealed and the moisture will be locked in
after the floor is closed in. At this point, I am considering putting in what
insulation I can and then laying down vapor barrier and the plywood without
nailing it in. Then I could cover the plywood with the plastic vapor barrier
that will be later used for the ceiling as an temporary extra protection while
I am away. I could leave the site covered with the normal plastic cover, the
new tarp and the vapor barrier over the plywood as an extra protection for the
plywood. When I returned I would remove the plywood that was laid down but not
nailed, and finish the insulation. Make sure the vapor barrier was still fully
dry and install in over the insulation and then nail down the plywood (3/4
inch) floor over the vapor barrier. This approach will add another measure of
protection and may be considered even if there is time to fully insulate.
So at lot depends on the weather conditions over the next few days. I want to
make sure the plywood is on the floor because it will provide a smooth
surface. If I did not add the plywood then the plastic would be suspended
between the joists and with we got heavy rain it would accumulate in the
spaces between the joists putting a lot of stress on the plastic. Once the
floor is sealed and finished the it will need to be covered until the job is
completed. Building of the walls will take place on the uncovered floors as
conditions permit. Once all the walls are complete and the joists for the
attic floor are cut to length then the walls will be raised and the attic
floor will be installed over a few days of non snow/rain conditions. After
that the attic floor will be covered and act as a roof while the walls are
finished. At this point the workshop will be enclosed and work on the roof
rafters will take place inside. The roof will be a separate project that will
also have to be all set up to complete within a few days of good weather.
You can see that accurate weather forecasting is essential to a job like this,
I can get the latest weather forecast off the internet. Long range (5 to 7
days) gives a good general view of planning, but for days when only a part of
a day will be snow free I use the latest radar maps (updated every 15
minutes). I can track individual snow squalls and forecast very accurately
when or if a particular squall will hit this area. In jobs like this one where
good conditions are limited I can often find good work conditions, even when
the general forecast is for snow because considerable periods of the day can
be snow free. So living out in the middle of the woods, you can still the
advantage of having weather radar and satellites bring you the latest birds-
eye view of what is happening. This makes scheduling a pretty sophisticated
operation and takes a lot of guesswork out of planning your work outdoors.
This week the focus of work is to get as much done on the floor as possible
using only snow free weather conditions and leave the floor sealed as well as
possible for the time I am away.
The down side to having to work on such a weather controlled schedule is that
you as the worker can end up with a pretty uncertain work week with missed
days off. Normally you should try to keep your work week on as consistent a
schedule as possible because it is a much more relaxed environment for you as
a worker and you can pace you work knowing what days are heavy physical work
and balance it with less demanding work in between. For example, moving all th
floor joists around and doing a lot of nailing, especially when nailing up
from under the floor is demanding work and is best to have the following day
involve different work so you do not get too many muscle aches from highly
repetitive work.
Given the fact that the work shop has to be completed (at least the roof on)
by the time the spring works begins in the gardens, it is sometimes necessary
to push the limits on your normal rules of work scheduling. Otherwise you will
end up with even more demanding when gardening work begins. Gardening work
begins when the soil is dry enough to be tillable. Sometimes that may happen
as early as late March up here. So at this point, the schedule is tight, but
barring any major problems, is something that can be done.
The original plan was to build the workshop, and within a year or 2 begin
work on the house. The best plan for most homesteaders, would be to build the
smaller 12x16 workshop and live in it while building your larger 2 story house
(say 16x20). Then when your house is complete you could use the entire
workshop for your work. I am currently living in a small cabin near the front
of the property that will later be used for storage. The work shop and new
house will be further back on the land. I am thinking of setting up the
workshop building as a workshop and a summer living space. The storage of all
my spare parts and tools will remain in the shed were they are currently
stored and only the most frequently used tools will be moved into the new
workshop. I plan on setting up an alternator for dc electric generation to
charge my 12 volt system, the corn grinder, and a piston water pump at the new
workshop. They will all be run off a 6 or 8 hp gasoline engine out side the
building.
If I decide to use the workshop for a summer living space, then I will have
more incentive the finish the interior. In the future, depending on how long
it looks like it will take to build the new house, I may winterize (insulate
and add a wood stove) to the workshop and possibly move into it full time
before I build the bigger cabin. This will allow me to be closer to my wood
supply and I could use my current cabin as a part time workshop. The limiting
factor on this plan is whether or not I can set up a wire to bring the phone
line back to the new workshop to get internet access. Since this will be
needed eventually for the house, it may be worth investing the few hundred
dollars for wire to make the connection.
So in the meantime, I will tentatively plan on setting up the workshop/summer
house, while I look into the problems involved in getting a wire back through
the woods to the house site (about 1/4 mile from the road). By the fall I will
have to decide to either stay in my current location (I have enough firewood
here now to do that) or set up the wire to the new location and move back
there. If it is too much to get the wire back there this year (in either money
or labor) then I may stay at this location for the winter and try to winterize
the new workshop for the following year. This take a lot of pressure of the
need to rush the building of the main house. With a semi-work shop and
temporary living arrangement in the workshop I would be in a good position to
build the main house gradually. Hopefully I will have power (12 volt system
running on a gasoline engine and a car alternator) and water (from a piston
pump from the spring) all set up before the fall.
So these are the tentative plans for this year, meanwhile I have all my seed
orders received and the seeds ready to go for this year. I save most of my own
seeds but each year I try new varieties and replenish seeds that are not
worth growing (like cabbage). Lots of things going on, but looking forward to
moving into a new place to live (at least for the summer) can be a good
incentive to look forward to.
02-27-02
A lot has happened since the last entry in the journal on 02-04-02. During the
week of 02-04-04 the subfloor (under the insulation area) was completed. In
between periods of snow the insulation was added, a layer of plastic (6 mill)
was added over the insulation as a vapor barrier, and the plywood was loosely
nailed in on the floor. A layer of plastic was added over the plywood to
protect from water and a layer of tarp and another layer of plastic was added
over that to keep water from getting to the plywood or into the insulation
under the plywood.
After returning from a week of visiting relatives, the plywood was squared and
nailed to the floor joists. Once the plywood is on then special care is needed
to make sure no water gets in to wet the plywood or get under the plywood and
to be trapped in between the plywood and the vapor barrier. Conditions for the
rest of the week were too wet to allow work on building, so time was spent in
developing more detailed plans for the workshop walls.
A piston water pump (Gould brand) was purchased using a local articles for
sale paper. The workshop is near a spring and the pump will be used to pump
water to the workshop and later to the nearby house. A piston pump has a
distinct advantage over the more common impeller or jet pump in that it can be
run at any speed and still pump water. It can also be run by hand (by turning
the wheel), by an electric motor, or by a gasoline engine. It can even be run
by a windmill or by a bike as an alternative to energy use. We will be using
the small gasoline engine (6 to 8 hp) that will run the other power tools in
the workshop. The option to pump small quantities by handle will be the backup
system.
The pump was not used for a while so it was opened up and cleaned out. The
seals were replaced as needed and the leather seals around the piston were
replaced. These seals are now hard to find. We found them at our local
hardware store and stocked up for the future, but you should not consider
buying a used piston pump unless you are sure you have a good source for these
leather seals.
Work on the pump filled in for work on the days when it was too wet to work on
building. In addition, we made trips to neighbor's buildings to get ideas on
construction options for the workshop. Heights for windows, details on how to
connect rafters for the roof and very intensive work on how the workshop would
be used were all considered in making the final plans for the building.
The last of our winter storage tomatoes (burpee winter storage tomatoes - open
pollinated) was eaten after almost 6 months in storage. The tomatoes were
stored one layer deep (not wrapped) in stackable tomatoes boxes (get them free
at the local supermarket). The tomatoes must be kept above 50 degrees F as
they ripen during storage. The closer to 50 degrees the slower they ripen.
The tomatoes boxes are checked each week for tomatoes that are ripe. They are
used fresh, cooked and in sauce. The tomatoes have a slightly tart taste but
once you get used to it they are a welcome treat in the winter when tomatoes
in the store are very expensive and not very tasty. We generally try to grow
enough tomatoes to store about 300 lbs each fall for the winter months.
We had special weather conditions that we were able to take advantage of this
week. The weather was unusually warm and we had one day with temperatures
around 55 degrees F with sun and a strong breeze. This was enough of a break
in the winter conditions to allow us to polyurethane the plywood floor. Using
a fast dry polyurethane and the good breeze, allowed the floor to dry before
dark. This opportunity allowed us another level of insurance in protecting the
plywood and the insulation from getting wet. Now work on the floor can be done
with the knowledge that a slight amount of melt from snow during work will not
damage the plywood or the insulation. This will allow a lot more flexibility
in planning work on the project.
The decision to seal the floor was made at the last minute when the forecast
was revised. Originally the plan for the day was to go to town to get some
more lumber that was needed because of some last minute modifications in the
plans for the walls. The hope was to get the lumber moved back to the work
site with the snowmobile before the trails melted too much to allow transport.
With the forecast for even warmer conditions for that day, it was decided to
use the warm temperatures to our advantage. Covering the plywood with
polyurethane was worth more to our scheduling than moving the new lumber to
the site. As it was the sealing the floor was completed early enough so that
about 1/3 of the new lumber was moved to the site before the trials became
unusable. This example, points out again how important it is to be flexible in
your scheduling, so you can take advantage of changing weather conditions.
Today is just above freezing and mostly cloudy. A good day to work on the
final plans of the workshop to be ready to start cutting the lumber to size
for the walls later this week.
Although the sealed plywood floor adds new flexibility to the scheduling it
does have limits. We can not allow the floor to be exposed to any more than a
light wet snow or very light rain. It must be protected from heavy rain. Given
these limitations, the best plan is to work to get setup to be able to have
everything ready to assemble over a few days of good weather conditions. The
goal is to have the walls up and the second floor on top of the walls before
any exposure to rain. Once the walls are up and the second floor is on, then
we can cover the second floor with layers of plastic to serve as a temporary
roof before starting work on the final roof. This will involve a lot of
preparation.
The lumber for each of the walls will be assembled on the floor in the reverse
order of how the walls will be raised. The 2 side walls 16 feet long will be
assembled first and laid out on the floor. The 2 end walls will be assembled
next on top of the side walls on the floor. This will allow covering with
plastic each night in case of rain. Once all the walls are cut and assembled
and stacked on the floor then all the lumber for the attic floor will be cut
to size. The attic floor can not be assembled in advance because it would be
too heavy to lift to the top of the walls in that state.
Once the walls are ready and the lumber is cut to size for the attic floor
then we will need to wait for a 2 or 3 day period where no rain is forecast so
we will have plenty of time to raise the walls and assemble the attic floor
and cover it with plywood and plastic before any possible rain. Once the attic
floor is covered then work on cutting the lumber for the roof can take place
inside the workshop. This will allow work even when weather conditions are not
favorable for outside work.
So the next phase starting this week will be gradually cutting and assembling
the walls on the floor of the workshop and covering each night until all the
walls are ready to raise and the lumber is all cut to size for the attic
floor. Today is the last day for any changes to the walls before the plans are
set. I will be making the final decisions on the height of the bottoms of all
the windows.
03-10-02
Since the last entry we have been framing walls and stacking them on the floor
to remain under cover. The weather has been a real factor in building as
only rarely were 2 days in a row suitable for working. Over this time we have
framed 3 of the walls. The north, south and west walls were completed and are
stacked under cover.
There was a big change in weather yesterday, as it went from the high 60's and
sunny to the 20's last nite. Very strong gusty winds (with speeds up to 60
mph) were blowing all night. Rain started early last evening and turned to
snow early this morning. Thunderstorms moved though in the middle of the
night. In anticipation of this extreme change of weather, we worked all day
friday and saturday to finish the south and west walls and get the whole
project covered securely before the change of weather. Hopefully the covering
of a layer of plastic, a tarp, and another layer of plastice held, but I
haven't check yet.
This weeks project will be framing the east wall, cutting all the lumber for
the attic floor, and planning for raising the walls. The walls are very heavy.
because they are made with 2x6 dimesion lumber. This means we will have to use
a combination of ropes, comealongs, and jacks to raise the walls in place. The
wall raising will need to be well planned in advance, because we will have to
have the walls all raised and the attic floor finished and covered with
plastic between periods of rain or snow. So there is a lot to do to get ready
for the next phase.
Between periods of working on the building I have started work on cutting
trees to clear a path through the forest for an electric fence for a
neighbor. This job for pay fit in nicely with my building work because I can
cut trees on days where I can not work on building because of snow or short
periods of rain. In addition, I have been working on fixing the electric fence
in my garden where a tree fell down on the wires. The deer have started moving
into the garden to eat the cover crops now that the snow has melted. The
fence is turned off in the winter once the snow covers the ground. It is
very important to stop this behavior before it gets established because deer
are creatures of habit and once a habit starts it is hard to change their
behavior. If they get a good taste of the cover crops they will be
continually testing the fence to get back in. This means that fixing the fence
is now a top priority. Early this week I expect to have the fence fixed and
reconnected to the 12 volt electric fence charger
See: Managing Deer In The Home Garden.
I am also adding a wider gate to allow access to the garden with a vehicle so
that I could bring compost or manure right into the garden if I find a good
source locally.
On the 12 volt electricaly system for the house, there has been a new
strategy. Right now all the electrical equipment in the house is either 12
volt dc or 110 ac (under 175 watts). The tape player, tv, fluorescent lamp (6
watt desk, and 30 watt general) and radio are all 12 volt dc. The laptop
computer, printer, and small wattage 110 volt ac run off a 175 watt (400
surge) dc to ac inverter. This 12 volt dc battery system is charged with a car
alternator. The only shortcoming of this system has been that I could not run
a power drill. I had planning on upgrading to a larger inverter to handle the
power required for the drill, but I found another solution to this problem. A
larger inverter would cost in the $60 to $100 plus range. But the price of
cordless drills has come down drastically recently and this technology has
become much more effecient. I tested a cordless drill for how well it could
screw a deck screw into a thick piece of lumber and found it had plently of
torque to spare. Now the down side of the cordless drills is that the
rechargable batteries eventually run out and need to be replaced (and they are
expensive). However, from my point of view I really do not need a cordless
drill, I just need a drill that will run off my current 12 volt system. I have
no problem with a cord. The solution to the drill problem, is to wire up the
cordless drill to a cord instead of its' rechargable battery and and plug into
my 12 volt battery system. Cordless drills currently come in 9.6 volt dc, 12
volt dc and 14.6 volt dc. I found a 12 volt dc drill (name brand) on sale (was
$80) for only $40. This was much less than the cost of an inverter, and the
drill have been designed to give the maximium torque (twist power) for the
least consumption of energy to extend the battery life of the cordless drill.
This turns out to be the perfect solution to my problem. Initial tests on my
12 volt system went well, now I just need to design a safe, convenient method
of connecting either to the cordless battery that comes with the drill or to a
plug in arrangement (I am working on) that will attach a cord that plugs into
my 12 volt system. A perfect inexpensive compliment to my 12 volt system that
allows access to all the advantages of a power drill.
With all the electronic devices that now connect to cigarette lighters in a
car, the 12 volt system can now include almost anything you need. All the
devices are specifically designed to work with 12 volt dc and, in addition, to
use as little power as possible to do the job. With the new cordless tools
technology (some based on 12 volt cd) many power tools will soon be available
in 12 volt dc. This makes much more sense for 12 volt dc systems (and solar
systems) to use dc tools directly rather than inverting your dc power to ac to
run a comventional power tool. In addition, conventional power tools pride
themselves on how being very high wattage because that shows they have more
power. On a 110 volt system that is not a problem but on a 12 volt (or solar)
system the least power consumption to do the job, the better. Cordless power
tools are designed to use as little power as possible, so they are the perfect
fit for the 12 volt dc system.
04-09-02
The week that was planned to raise the framed walls of the workshop turned out
to be a week of rain, so the walls were not raised. The weather warmed enough
to allow work in the garden to begin. So once again we can see the need for
flexibility in scheduling. The gardens are now the primary job because weather
conditions are good for tilling and planting while frequent rain showers makes
conditions unfavorable for building.
The workshop walls are all framed and laying on top of the floor, covered with
2 layers of plastice and a tarp. This is a very stable situation and a good
way to leave the project while garden work begins because this time of year is
subject to periods of rain. The plan now is to keep the workshop covered as it
is through the garden planting period until mid-June. When the spring planting
is over then the weather normally changes to longer periods of weather without
rain. A normal summer cycle is about 3 to 7 days of gradually warming and
clear weather followed by a brief period of rain (usually in the form of
a thunderstorm) followed by cooler weather and clear days with gradual
warming. This will be ideal conditions for continuing the workshop project. In
addition, a number of my friends will have more time after mid-June than now,
so it will be easier to get help raising the walls of the workshop. The
full focus now is garden preparation and planting, while the workshop is
protected from rain under cover.
The robins, geese, and wood cocks are back. The spring peepers started
yesterday in the ponds so spring is fully underway. Once the soil was dry
enough to till, I tilled all the edges between the gardens and the terraces in
the corn garden. This helps cut down on any quack grass that may be trying to
grow into the gardens from the terraces before the corn is planted in late
May.
Wide rows of lettuce and carrots were planted and the sugar snap peas (sugar
anne and cascadia varietes) were soaked in water to begin sprouting. Once the
peas show the slightest sign of the roots starting to swell in the seeds, the
seeds will be sprinkled with legume innoculant and planted. Soaking the peas
before planting is very helpful in preventing the seeds from rotting in cold
soil. Seeds that are not soaked take a while to sprout in cold soil and often
the soil organisms that cause rott will begin to rott the seeds before they
become active. Soaked seeds are fully active when they are planted and have a
good head start on the rotting organisms. In tests I've done between sprouted
and unspouted snap peas seeds the sprouted seeds have done much better in cold
springs, often making the difference between a complete loss of seeds and an
almost complete stand under extreme conditions. Soaking is well worth the
effort in peas. Soaking also works well with direct seeded cucumbers, and
squash. Soaking is not recommended with dry beans as it often causes the seeds
to crack and actually makes for a poor seeding stand.
Meanwhile, some progress has been made on getting set up for the new watering
system for the garden. I have managed to convert my 110 volt jet water pump to
a pump that can be run with a gas engine by removing the fan and replacing it
with a pulley. The fan was used to cool the electric motor, so removing the
fan should have no adverse effect on the pump itself
(See water pump).
This allows me run the pump dircectly from a gasoline motor and without using
a generator. I am now setting up a system of pulleys and pillow bearings to
run a prototype system that will be able to run the pump and the alternator
from one gasoline engine at the same time or the alternator by itself. This
will allow me to charge my batteries whenever I pump water. I am just starting
to test parts of this system and will install more water pipes within the next
week or so.
Spring is a very important time for watering because strong sunlight can dry
the top 1/4 to 1/2 inch of soil rather quickly. Many early small seeded crops
like lettuce and carrots are planted right near the surface and are easily
dried out during hot sunny conditions. Watering is the only way to save these
crops from drying to the point of killing the emerging plants. El Nino
conditions in this area have generally meant dry and abnormally hot conditions
in the past (ie: 90 degrees F in May !). Forecasters have been predicting
possible El Nino conditions this season so a setting up a watering system
early is a high priority.
Today cover crops will be the main job. Winter rye was planted in the fall and
most of the crop survived the winter fairly well, considering a tree fell on
the electric fence in the fall and the deer got in the garden to have a good
feed on the rye before the snow covered it. This lead to some areas of rye
this spring looking pretty thin. So I will spread some rye seed over the
already sown areas and till down about 2 inches and then throw some red clover
on top and then pack the soil down by going over the area with the tiller
having only the tires touch the ground. This is the same method I normally use
to plant new cover crops. The rye that is already started will mostly recover
from the tilling because it can reroot pretty well. The goal in the garden is
to reach the point that 1/3 of the garden in any given year is in cover crop.
This builds the soil and prevents erosion.
Sections of the garden that were in the rye/red clover cover crop last season
need to be tilled early in the spring so the clover will not begin to regrow
and the organic matter from the rye will have time to begin to breakdown
before planting. Last fall all the tall rye (4-6 foot tall) was rolled down in
parallel to the sides of the garden by rolling a 50 gallon steel drum down the
garden. This flattened all the tall rye stems so that they would have a good
contact with the ground. Good contact with the ground will accelerate the
breakdown of the long stems and prevent the stems from rapping around the
tiller blades in the spring. This method worked very well this year, because
it only took 2 passes of the tiller to incorporate the cover into the soil and
there was no tangling of the stems in the tiller blades.
This week, the soaked peas will be planted, more cover crops will be started,
other cold weather crops like brocolli, cabbage and beets will be planned and
possibly planted. As time permits the water system will be the next priority.
With temperatures forecast to be in the 50's during the day and 30's a night
this is perfect weather for early planting.
04-21-02
Today is Sunday, a day off, except for writing in the journal and making the
work schedule for the week.
Spring is here in full force. We have had over a week of exceptionally warm
weather in the 70's and 80's F. Growth during this period has been very fast,
as an increase of 20 degrees F can almost double the growth rate of many
plants. The normal temperatures for this time of year is daytime temperatures
in the 50's F with nights in the 30's F. So a week of 70's F days and 50's F
nights can be equal to 2 weeks of normal growth. The june berries are in bloom
now almost 2 weeks ahead of last season.
All the edges of the corn garden were till to prevent any quack grass from
getting a start before the corn is planted in May. All the early crops of
lettuce, carrots, beets, snap peas, and soup peas were planted and are now up
and growing. Last night was pretty cold (25 F) but all the cold weather crops
can take temperatures down to about 20 F, so there was no problem with the
temperature.
The entire water delivery system for the garden was redesigned to deal with
the fact that were are now relying on an alternator electrical system and not
a 110 volt AC system. The old AC jet water pump was converted to a pulley
driven pump by removing the fan from the AC motor of the pump and adding a 3"
diameter pulley. The pump is now run off a series of pullies and belts from a
gasoline engine. The engine also runs an alternator that charges the batteries
for your 12 volt dc system while the water is pumping. (see last entry). The
pump and water system was setup and used during the warm weather. We even had
a number of solar hot water heated showers during the warm sunny weather.
There are currently 3 50 gallon steel drums on the top of the hill of the
garden for water storage. They were filled last night in anticipation of the
cold night. After the tanks were filled all the lines of the water system were
drained to avoid any damage to the metal faucets during the 20 degree night
temperatures. The water tanks have too much volume of water (and heat capacity)
to be damaged by last night's cold. The full tanks will allow us to
use a garden hose to syphon water to water the plants like lettuce and carrots
that can dry out easily in sunny weather (1/2 inch from the surface). If
forecast for temperatures in the 20's recurr then all we have to do is drain
the one garden hose and not the entire water system. Once the danger of cold
nights gets lower then we can easily syphon water from the storage tanks to an
special inlet faucet that will fill the line from the storage tank to the well
to the pump. This will fill the line with water and make it easy to start the
pump and refill the system. After that the water system will not be drained
until the fall.
The previous system based on the generator, used a wire from the house (where
the generator was run) to the well. The well had a float in the well (block of
wood on a string) that would turn off the generator when the well was so low
that it would run out of water. The jet water pump can not run without water
or it will damage the seals. The new system, that does not use the generator
needed a new method of automatic shut off. In the old system the switch shut
off the electricity to the pump when the well was too low. In the new system
we came up with a pretty good shut off system that is easy to setup and is very
efficient. The same wires used by the old system are now connected to the shut
off wire for the gasoline engine (this wire is usually actuated by the gas
lever). The shut off is really the low voltage side of the ignition system of
the gasoline engine. So what we did is setup up the old switch for the well
shut off to connect when the well was too low (instead of disconnect in the
old system that disconnected the power from the pump). This allows us to short
out the gasoline ignition system when the switch is pulled. A wire from the
shut off line on the gasoline engine is wired to one side of a regular female
plug from an extension cord. The other side of the plug is wired to a ground
on the engine (a bolt to the engine frame). The female plug is then connected
to a male plug that connects to the switch at the well. Electricity from the
engine electrical system activates one wire in the cord, when the well switch
closes the circuit, it connects back to the other wire in the extention line
and the electricity goes back down the other wire to the ground on the engine.
The ignitiion system shorts out and the engine stops. This system works nicely
and means you will not run you pump dry. No expensive switches or external
sources of electricity are needed so this system should be able to be used
with any gasoline engine for remote control by a switch.
We also did some major work on the electrical system, including the addition
of an electronic voltage regulator on the alternator. Up until now the
alternator did not have a voltage regulator so we had to add load to the
electrical system to keep the voltage from going too near the end of the
battery charging cycle. The new voltage regulator is working really well, by
keeping the system between 14.4 and about 13.6 volts during periods of load
ranging from 5 to 30 amps. It really works remarkably well and should last
indefinitely because it is a solid state (no moving parts) system. This is a
real improvement in our system.
The black flies have just started a little. They are out sometimes on some
days but not really a problem (yet) and not biting (yet). Normally the
blackflies do not come out until May, so the warm weather did have some
unwelcome concequences but so far not bad. The key to black fly protection is
a wide brimmed hat (like a straw hat) and a cloth or screen that hangs down
in the back of the hat from the front of one ear around back to the front of
the other ear. This protects from most blackflies from getting near your face.
Many of the flies will fly above the hat and not bother you at all and the
cloth will protect the back of your neck.
Believe it or not, the best defense against black flies (especially their
bites) is to not be annoyed by them flying around you. If you get upset then
you release perspiration and smells that drive black flies into a frenzy. If
you work near a person who is especially upset and hassled by the blackflies
then you can see this for yourself when the blackflies actually leave you to
go to the person most upset by the flies. Of course this leads the person to
be even more upset and more blackflies attack. This can actually lead to very
serious problem with people who are lost in the woods and do not know how to
deal with blackflies because the more you struggle the more you attract the
flies and the more they bite. Some people have been found in a near death
situation when caught in this viscious cycle. So if you don't get upset with
blackflies, wear the broad brimmed hat with a cloth or screen back, then
blackflies are usually no more than an annoyance. They tend to get more
aggressive in biting right before they end around the end of May. Remember you
can only have black flies in an area if you have really clean water. So
remind yourself during blackfly season that you are lucky to be in an area
that has clean water.
Black flies do not like closed spaces, so the cloth around your hat can help
in that way also. Black flies will go right to the window if closed in a house
and spend the rest of their life trying to get out the window and not even try
to bite you when you are in the room. So bring all the black flies you can into
your house or car and have less outside to bother you. Black flies are not a
problem in your house, unlike mosquitos who love to wait till you are almost
ready to sleep before they begin their quiet buzz attack.
Got a good batch of potatoes (till hard and not sprouting) up from the root
cellar. Still have cabbage and carrots stored too. More cover crops of winter
rye (can be planted in the spring for cover crop) and red clover were planted.
The goal is to have about 1/3 of the garden in cover crop each season. The
practice of rolling a 50 gal drum down the rye cover crop in the fall just
when the seeds are starting to set, has made it easy to incorporate the rye
into the soil in the spring because the lond tough stems have broken down to
till in easily. This year 2 tills can incorporte the cover crop, before this
practice it could take 4 or 5 tills to incorporate. Drum rolling rye in the
fall will be an established practice here from now on.
This week the cold frame will be setup. Will be trying to get seed potatoes
from supplier and cut to size to cure before planting (cover after cutting for
2 days then expose to direct sun in boxes to promote short green sprouts
before planting). 100 Rosa Roses will be arriving that will need to be planted
for a hedge this week. These roses are a good souce of rose hips (high in
vitamin C) and wonderful smelling flowers. Do not plant these roses except in
places where both sides of the hedge will be mowed, or the roses will spread
under ground and take over an area. Mowing will stop the break by cuting off
the sprouts as they come up through the ground.
04-28-02
This week, all the seed potatoes have been cut into 2 ounce pieces with at
least 2 eyes in each piece. These pieces were dried slowly in a box in a warm
place covered with a towel for about a day. Once the skin starts to form on
the cut then the potato pieces can be laid out in boxes with the non cut side
facing up. These boxes can be put in a location in the light with at least
some sunlight for a few days. The goal is to encourage the sprouts to begin to
form in a warm location and to keep the sprouts short and green with the sun.
Potato sprouts grow long and thin in the absence of light but will grow short
and green in partial or full sun. You want to get some good sized sprouts
forming 1/4 to 1/2 inch long so the pieces will have ahead start when they get
put into the ground. Many people just cut the potato pieces to size and plant.
We like the method used in europe (described above) because it allows the
sprouts to get a good start indoors while the cut heals. Potatoes started this
way have much less chance of rotting in the ground, especially under cold
spring conditions and it gives them a head start on growth that could put them
a week or more ahead of direct seeded plants.
The presprouting method of starting potatoes also allows you to wait until
conditions are good for planting rather than forcing you to plant by date when
conditions may not be good for working in the garden (ie: cold, rainy). You
can wait for up to 2 weeks if you are presprouting because the potatoes are
growing better sprouts in a warm indoor location than they would have in cold
soil outside. In addition, it is more enjoyable to plant potatoes trenches
when the weather is sunny and warm. The only limitation of presprouting
potatoes is that you need to make sure the potatoe pieces do not lose too much
moisture and begin to shrivel. Potatoes are more likely to shrivel within a
day or 2 of cutting to size, so if you want to keep your potatoes indoors for
a long period before planting be sure to wait at least 2 or 3 days for the
cuts to heal (at room temperature or higher) before you expose them to full
sunlight.
The easiest way to plant potatoes is to plow a trench with a special
trench/hiller attachment that is available for rear tine rototillers (like the
troybuilt tiller that we use). The trech/hiller attachment takes some getting
used to, but if you run the tiller fast down a row that has been tilled at
least once then the job goes easier. Once the rows are tilled about 3 feet
apart (to leave room for later hilling) then can walk down the row backwards,
stooping down on one knee and push a potato cutting down in the soil and cover
with about 2 or 3 inches of soil. Place the potato cuttings about 1 foot apart
in the row.
If you expect a heavy frost and the potatoes have already come up through the
soil, then it is a good idea to cover the potatoes with a couple inches of
soil to prevent them from getting cooked with the frost. Potatoes can send up
new sprouts after being hit by frost (especially if they are sprouting from
healed cut potatoes rather than direct seeded cut potatoes). For best results,
always hill potatoes to protect from frost or your plants will be delayed.
Once the potatoes have escaped the danger of frost, then you will need to hill
2 times (once at about 6-10 inches high and once at about 12-14 inches high.
You can hill with a hiller attachment on a rear tine tiller, a low wheel
cultivator with a plow attachment, or a hoe. Hilling protects the tubers that
will form from getting exposed to the sun and turning green. Green potatoes
have toxics (characteric of the nightshade family of plants) that are not good
to eat, so keep your potatoes hilled and protected from the sun.
We cut about 400 to 500 potato pieces this week and will put then in the sun
on the next sunny day. The trenches will be marked and trenches made this
week, so planting can take place when the sprouts are well formed and the
weather is warm and sunny. When planting, make sure you surround the seed
potato with most (not dry) soil.
Next project this week is getting ready to start the tomatoes for the cold
frame. We like to start tomatoes here May 1. That is considered late by most
people but we start the seeds indoors in quart yogurt or cottage cheese
containers (with 2 holes in the bottome of each container) and keep them
indoors until the tomatoes germinate. Once the tomatoes are up and need sun
they must be moved to the cold frame to keep them from growning long and
slender trying to get more sun. Since we go directly into the cold frame after
starting we do not want to be starting tomatoes too early or we will be having
to protect them from heavy frost conditions in the cold frame. Late planting,
like May 1 is a good compromise because we are late enough to escape the worst
of the hard frost while still being early enough to have some good growth
before the plants are set out.
Once in the cold frame the tomatoes will grow rapidly because the temperature
in the cold frame will range from about 70 to 90 degrees F on sunny days. This
will allow very rapid growth. The plants are held in the cold frame until June
15 (considered very late by most gardeners up here). By keeping the tomatoes
in the cold frame till June 15, we keep the growth rapid right up until the
plants are set in the ground. In addition, in is very common for a cold snap
to set back tomatoe transplants that are set out in early june. Cold stressed
tomato transplants will turn purple and slow down in growth. Late transplanted
tomatoes (june 15) will often be ahead of early transplanted tomatoes if we
have cold conditions. Sunny conditions are very important in transplant growth
because the cold frame will only heat up to the 70 to 90 degree temperatures
if the sun is out. Cloudy conditions can lead to a delay in cold frame growth,
but on average, we find late started and late transplanted tomatoes the best
way to go because it saves work, involves less risk of cold or frost damage,
and gives better tomato yields for our conditions.
05-13-02 Monday
Raining today and cold (40's) and it's looking like most of this week will be like this except for thursday (some sun). The night temperatures are colder than normal in the 30's with possible frost. The cold weather crops are able to take temperatures down to about 20 degress F, but the tomatoes had to be moved out of the cold frame because of the possiblity of tempertures below freezing at night. The tomatoes are now up and spread out in front of windows to keep them in the sun and stop them from growing too tall and thin reaching for light. They will have to stay indoor for a few more days until the night temperatures are warmer, then they will move back to the cold frame until they are transplanted (hopefully). Meanwhile, the cat has to be trained not to walk on the transplants.
The potato plants have not broken through the soil yet, so they are still safe from any frosts. The peas (dry and snap) are doing well. The cover crops of rye and red clover are doing really well with all this rain. The wide row lettuce and wide row carrots are coming up a little thin because of all the low temperatures, but will probably be ok. The water lines for the garden are full and all the faucets and values are covered with plastic shopping bags 1/2 filled with dry leaves to insulate them from the possible freezing temperatures. The black plastic lines themselves are usually ok until the tempertures go into the 20's (not forecast).
We had a day of winds up to 50 mph and some of the plastic coverings came off of the building site. The coverings were replaced and there appeared to be no water damage. So that should keep the building structures dry until later in the summer when there is more time to work on it.
The adventure this week was the car. The battery stopped charging in the car. It appeared that the alternator was capable of working in some of the tests that I did so I bought a new voltage regulator (on this model of car the voltage regulator was relatively inexpensive). I waited about a week to get the part because I waited to get a ride to town with a neighbor when he was normally going to the town with the best parts store. Unfortunately, the new voltage regulator did not fix the problem. A rebuilt alternator is very expensive for this car so I am in no hurry to get a new one until I am sure the problem is in the alternator and not in the wiring. The local libraries up here have recently gone to an online system where I can search all the local libraries and order a book to be delivered to my local library for pickup (usually within a week). I found a library that has the manual for my car that includes the wiring diagram, so I will order that book and wait to decide what to do until after I check the wiring. In the meantime, I needed a setup a method for getting to town. The alternator of a car charges the battery as you drive, with the alternator system not working the battery of the car will run down as you drive because it is supplying electricity to the spark plugs as you drive. How long the car will run without an alternator depends on what is running in the car. If the lights are on it will run down in a very short time. If the lights are off, the fan is off, and everything else is off then you have more time.
I setup a system in the car that allows me to run the car without the alternator working by setting up all my batteries from my electric system in the house in the car. I put 4 batteries in the back of the car and connected them through a fused line (30 amp) with 10 gauge wire to a plug that fits in the cigarette lighter. This will allow the car to draw off all 4 batteries in the car and the battery in the engine while I drive. I have to be sure not to have the cigarette lighter socket plugged in when the car is started as that will take too much load through the cigarette lighter and blow the fuse because the starter is a big draw of electricity. Once the car is started THEN I can plug in the batteries in the car to help lessen the load on the battery in the engine because the load on normal drive (without the lights on) is not too much for the fuse. I added a voltage meter to keep tabs of the voltage in the batteries to make sure I was not getting too low (12.2 volts is about 1/2 discharge - the maximium). With this method I was able to go to town and back without any problems. I can not travel during rain because I will need to use the wipers and the headlights. Using this method I should be able to go to town when I need to and then recharge the batteries on my home alternator system and put fully rechaged batteries back in the car for the next time. This will allow me to wait to get the car manual with the wiring diagram before I have to decide if I want to test the alternator. This system will not be too much of a problem because I usually only go to town once or twice a week this time of year. My 12 volt system is currently charging all the batteries while I am running the computer, this will get the batteries ready for a trip to town tomorrow. The system is currently charging at about 20 amps (a pretty good charge rate).
Meanwhile this week looks like the work will have to be scheduled indoors. Corn seed from last year is still on the cob in four 50 gallon steel drums stored outside, so I can see the quality of the ear in deciding the seed stock for this year. The corn is also separated by row from my corn breeding project
[See Corn Breeding Project]. This week the corn will have to be sorted for the breeding project and shelled with a hand cranked corn sheller (takes the kernals off the cob). With more than 1,500 ears of corn to shell a mechanical sheller is needed. I picked up a nice old sheller from a local used items store a few years ago and it was well worth the price. Also during rainy weather work will begin on spring cleaning of the work shed. The new alternator system will be adjusted to allow the corn grinder to run on the same pulley system in the shed so I will be able to grind corn for corn bread. The weather has once again changed the plans for this week but you need to be flexible to be able to take best advantage of the work conditions as the weather changes.
05-18-02 Saturday
I have been sorting last years dry corn for seed. For the past 20 years, I
have been working on developing a corn variety adapted for this area (See Corn Breeding). Below is a general
summary of the results of last years breeding program.
After counting and sorting all the ears, there were about 1,000 ears. About
30% were flour corn and 70% were flint or dent like. The flint and dent like
corn is a harder corn and is higher in protein, so I have been selecting for
the flint/dent type corn and selecting against the flour corn. The selection
is going pretty well in this area. The main selection for the past 2 seasons
has been selecting for resistance to corn rust. I have crossed the most
resistant plants that I found 2 years ago with the general population of the
corn and last year tried to increase the percentage of rust resistance by
removing the tassles of all the corn that was not resistant while leaving the
tassles on the most resistant types. The tassles spread the pollen, so by
allowing only the most resistant types to pollenate the corn field, I hope to
increase the percentage of resistant corn in the population.
I have also been selecting for 2 ears on a plant by saving and planting more
seed from 2 ear plants. This year of the total number of ears about 25% were
from 2 ear plants. I figure about 15% of the plants are 2 ear plants. This
year I will increase the number of seeds from 2 ear plants that will be
planted to about 30% to 35% to increase the chances of more 2 ear plants next
year. Approximately 30% of the 2 ear cobs this year were flour and about 70 %
were flint like. This leads me to believe that the genes for 2 ears are
showing up in the flour and flint corn in about the same percentages as the
flour to flint ratio in the main crop. This is good news because it looks like
the genes for 2 ears are not connected to either flour or flint genes, so I
will be able to continue to select for 2 ears and for more flint without
having to give up either. Sometimes genes for different traits can be
connected and you can not select for them separately. For example, if all the
2 eared plants produced only flour corn then I would have not been able to
select for 2 eared flints.
I have been keeping the ears that were ripe in the first picking separate from
the ears of the main crop picking and planting them in separate rows, but so
far I have not seen any more early ears from the plants that produced early
ears last season. I have, however, noticed that there might be a connection
between plants with 2 ears last season and decendants of those plants. So
selection for 2 ears can probably be increased by planting more seed from 2
eared parents.
The main selection this year will continue to be for rust resistance so I will
not select too heavily for other traits at this time because I want to keep a
lot of variety for future selection in the corn population. I will continue to
remove the smallest ears from all selections to cull out the less productive
traits.
I lost about 18% of my harvest in storage when one of my 50 gallon steel drums
leaked during the winter and the seed spoiled with mold. This season I will
have to have a better cover for the 50 gallon drums that are stored outdoors
for the winter. The other containers stored the corn with no problems. I feel
fortunate that the 2 rows of ears (2 rows out of 12 rows harvested) were some
of the less important plants in the breeding program.
The big adventure this week was when a cat that was visiting from the city
climbed up a tree when he saw a dog and ended up much higher than he had the
skills to come down. One of our local cats climbed up a tree nearby to keep
him company while he cried. He was beyond the reach of our longest ladder so
we decided to tie some plastic traps all around the base of the trees nearby
to catch the cat if he fell. After a good attempt at backing down the tree he
fell into our nets and was unharmed. So it turned out ok, hopefully he will
not climb so high next time.
Last night the temperature fell to 31 degrees F for a light frost. The cold
frame was covered with a thick layer of blankets and a top layer of plastic to
keep out the cold. The layer of plastic over the blankets was a real help and
the temperature in the cold frame only went down to about 40 F. Tonight might
be even colder so we may have to bring the tomatoes down to the house for the
night. This week has been exceptionally cold for this time of year.
The potatoes were just beginning to break through the soil so they were
covered with a little dirt to protect them from the frost. The other cold
weather crops that are up and growing can normally take temperatures down to
about 20 F without harm. The next few days will continue to be cold with a
warming trend forecast for later in the week.
Normally this would be the time to start planting corn, but with the weather
this cold, corn planting will have to be delayed. Corn does not like
temperatures below 50 F, so the planting will have to wait until the next
warming trend. If the next warm cycle looks like it will be short or with
night time temperatures in the 40's F then we may have to wait till the next
warm cycle. Corn seed is more likely to rot in the soil when temperature get
below 50 during germination. Early planting under cold conditions could do
more harm than good.
Have been reading some research on corn and was surprised to learn that only
about 50% of the water used by corn during the growing season comes from the
rain that falls after the corn is planted. Normally about 1/2 of the water
used during the season comes from water that is stored in the soil now, that
is why it is important to have plenty of moisture in the soil from the spring
melt. During the months of July and August corn will take water from deep
underground to make up for the fact that it uses more than 2 times as much
water during each of these months than is normally supplied by rain. Corn
roots and go down 6 feet into the ground to get water.
The tech manual for the car is ordered from the library and I will probably
test the alternator in town this week. Even if the alternator tests defective
I would like to wait to replace it until after I have the wiring diagrams and
can check out the wires. If there are problems in the wiring that caused the
alternator to fail then replacing the alternator will only result in the new
alternator going bad, either right away or sometime later.
This week the top priority is getting all the corn shelled and ready to plant.
The corn areas of the garden will be fertilized and tilled right before
planting. Final decisions on exactly what proportions of the different types
of corn seed need to be made also.
05-30-02
Raining today, with only 1/4 inch in the rain gauge. Indoor work this morning,
soaking squash and cucumber seeds in wet paper towels for sprouting before
setting out. Both squash and cucumber seeds are very sensitive to cold soils
and will rott if the soil is too cold for extended periods. The native
americans in this area always soaked their squash seeds in wet moss to give
them a head start in cold spring conditions.
The corn is up today. The green sprouts are just starting to show through the
soil and that means we have to setup protection against the crows and blue
jays today. Many gardeners do not realize that they are teaching crows and
jays to dig up corn when gardeners are careless about dropping even a few corn
grains on the soil surface when they are planting their corn. Even a few
dropped grains of corn on the soil surface will attract these birds, corn
grains on the soil surface will send out a green sprout from the grain if it
is wet and it does not take the birds long (crows and jay are very intellegent
birds) to figure out that the little green flags near by are markers for more
delicious corn grains underneath the soil. I have seen blue jays walk down a
row pulling up every green shoot of corn to get at the grain underneath. This
is why farmers have traditionally put up scare crows in the past. We find that
bird scare tape works even better. This tape (available from mail order seed
companies) is a strip of milar plastic that is red on one side and silver on
the other. You unroll a spool of it by holding the roll sideways so that the
tape will come off the roll from the side of the roll. This allows the tape to
make a spiral as it comes off the roll. Tieing this tape between poles on
either side of a corn crop will create a really startling effect as the tape
spirals back and forth in the wind, flashing red and silver. Birds in the crow
family, like crows and jays, are afraid to come near the tape. Birds like
robins have no problems coming near the tape and will even sit on the pole
that tape is tied to. Lucky for us only crows and jays are a problem for
corn. After the corn is up about 6 inches then the tape should be removed and
saved for use in the fall again. The birds will get adjusted to the tape if it
is left on too long in the same place. In the fall the tape will be put up
again as the corn begins to ripen to prevent the same birds from coming back
to sample the corn ears as they mature. We find this tape much better than a
scarecrow because birds get used to scarecrows if the scare crow is not
changed often.
The technical manual for the car arrived at the library this week. In fact, I
was able to order a second (more complete) manual from a neighboring library
about 30 miles away last Sunday online. When I arrived at my local library the
two car manuals were waiting for me to pick up. So the new Interlibrary loan
system works pretty good for me. The manual included a wiring diagram and this
allowed me to track down the problem in one of the wires. Since the wires all
merge into big cables in the car, I decided to just put in a new wire from the
point where the wire came from to where it was going. This corrected the
problem (for now) and the alternator is now charging the battery correctly.
Getting this manual saved me spending over $100 for a new alternator. So the
car is now back in service. I believe the air conditioner somehow put too
great a load on the alternator to cause the wire problem. In any case, it is a
real convience to be able to use the car without having to move the entire
battery bank to the back of the car to go to town.
This week the beans are being planted. Unlike peas, beans do not like to be
soaked before planting as the seeds often crack and will not germinate well
when presoaked. In addition, soaked seeds can not be planted in a planter. We
plant soy beans first because they are slighly more resistant to cold than dry
and snap beans. We plant 4 types of soy beans for growing to the dry stage.
This year I am growning out a number of bean crosses that were made a few
years ago to test some new varieties. Provider snap beans are our favorite for
picking fresh because they are resistant to 4 bean diseases and the seeds can
be saved to dry beans if you are tired of picking string beans.
More beans will be planted later this week and the squash gardens will be
tilled and fertilized for the squash sprouts. Squash sprouts will need to be
planted as soon as they start to show a good root. Be careful when planting
not to damage the root when you pack the soil. The terraces need mowing, and
the tomatoes in the cold frame will need thinning down to 3 plants per quart
container. The tomatoes are behind schedule because we had such a cold spring
with so little sun. A cold frame must have sun for heat and without it the
plants grow very slowly. The sun is now coming out almost every day, so the
cold frame is usually above 80 almost every day and the plants are rapidly
coming up to size. I normally plant them out late, about June 15 so they
should have plenty of time to grow to a good size by then.
The rye cover crop is getting ready to head, and the clover in the cover crops
is doing really well. The lettuce is growing fast but the wide rows were
planted too thin for maximum yield, so next year we will plant thicker and
thin to the best spacing. Snap peas were planted early and have had to endure
a very cold spring. The variety Sugar Anne did poorly under the cold
conditions but the variety Cascadia (from Oregon) did very well. Wide row
carrots are up ok. Onions planted from seed and carrots in single rows (for
storage are also up ok. The brocolli is suffering from flea beetle damage but
the trap crop of Red Giant Mustard is definitely taking the brunt of the flea
beetle damage. We planted the mustard to keep the flea beetles from killing
the young brocolli, so far it is making a big difference. Once the brocolli
gets above a certain size the beetles do on minor damage. We will keep seed
from the mustard for next year to serve as a trap crop for the beetles again.
Click Here To See Current (05-30-02) Garden Pictures
06-08-02
This has been a cold and wet spring. June 3 we had a late frost. The corn and
potaotes were both up, so we hilled them to protect them from the frost. Both
corn and potatoes can recover from a frost that kills the above ground growth.
Potatoes regrow using reserves from the tuber piece, that is why it is so
important to make sure your seed pieces are fully cured (skin forms over cut
pieces) so that the tubers are not going to rott. The corn can grow more
leaves because the growing tip is usually still underground in during early
growth. Even though both potatoes and corn can usually recover from early
frost damage, it is better not to use up the plants resources if you can avoid
it. If you know a late frost is coming and your corn and potatoes are up it is
a good idea to hill them early to cover the exposed plants and save them from
frost. Potatoes can be hilled early with no problems. Corn, if hilled early
does better if it is barely covered or if you rake off the some of the soil
with a leave rake gently to expose the green tops after the frost danger is
past. Even with 1,200 feet of dry corn to uncover it took only about 15
minutes, well worth the time. In comparision with corn that was not uncovered
and left to work it's way through the soil, corn that had it's tops uncovered
after a frost protection hilling resumed growth much earlier.
A few potato tops were left uncovered in a test and in the morning the plant
tops were frozen stiff (bending the leaves would break them). Normally this
means that the tops would turn black and die when the plants thawed out, but
in this case almost all of the test plants recovered fully. The plants must
have been just at the border line between frozen and permanently damaged. I
have never seen this before so it is probably a very narrow temperature range,
under most conditions the tops would have died back. As it turned out the
hilling was a very effective method of saving the plants from a real set back
with relatively little extra work. In addition, the hilled corn is probably
better protected from bluejay damage because the seed if deeper in the ground
and harding for the bluejays to find. We can probably take down the bird scare
tape sooner because of the effect of early hilling.
The sugar snap peas were damaged from the earlier low temperatures in the 20's
F, and this week the difference between the cascadia and the sugar anne
varieties is very pronounced. The cascadia variety is almost fully recovered
and doing really well, but the sugar anne variety has less than half the
plants recovered and is very noticably delayed. This is another example of the
advantages of planting at least 2 varieties of each crop to get some insurance
against a total loss or serious setback. Normally sugar anne is a week or 2
earlier than cascadia, this year the cascadia will probably be earlier and
yield normally whereas the sugar anne variety will be later and may yield less
than normal. Cascadia comes from Oregon and may be selected for cold and wet
conditions.
The soybeans, dry beans, and snap beans are just now coming up and were under
ground during the frost so most of them seem to be coming up in pretty good
stands, we can see better if any need replanting in a few days.
Tomatoes are still delayed in the cold frame due to the cold and cloudy spring
conditions, mostly because the cold frame can only heat up if the sun is out.
Recently the sun has been out more often and the cold frame temperatures have
been in the 90's F. The tomatoes are now making rapid growth and have been
thinned to the final tomato plant in each quart container. Quart yogurt or
cottage cheese containers with 2 holes in the bottom make great starter pots.
The tomatoes are normally set out about June 15, but given the cold conditions
this season a later setout would give them a better start. This year I will be
leaving on the 15th to visit, so the plants will go out on the 15th a little
smaller than normal.
I finally got the weedeater working. The problem turned out to be a small
screen in the carb that looked fine but was actually plugged and not allowing
any fuel to pass through. So if you are working on any 2 cycle carb (like a
chain saw or weedeater) you can not depend on a visual inspection to tell if
the screens are ok. Take them out and test them. With the weedeater back in
service, I was able to do a good job cutting under the electric fence and now
the few deer that were sneaking in (with the weeds under the fence shorting
out the fence to some degree) should get a pretty good shock. Deer are
constantly testing the fence, so you can not afford to let your fence go to
long without testing. I get a good spark when I ground the fence now. If I
will be gone for a few days then I need to make sure that the fence is fully
charged and make sure the deer have experienced it before I leave. If the deer
are still testing the fence then you take the risk that one of the deer
getting a shock will knock down a wire when it gets zapped and that will short
out the fence and leave your garden unprotected when you are gone. A few days
of no protection can mean a picnic for the deer and a disaster for you,
especially in the spring when the plants are small. A 15 minute snack for the
deer can mean the loss of a 100 foot row of peas for you. A few hours of
snaking can be a total disaster.
Now as the weather warms up and the sun is out more often, weeding is the most
important focus of attention. Get those weeds before they start to take over.
Early weeding saves time and is a lot easier than waiting until the weeds are
bigger. We use the planet jr wheel hoe (johnnys seeds). It is worth it's
weight in gold, unfortunately it costs almost that much (about $300, at last
check). We estimate it saves us over 40 hours a season in weeding time
compared to weeding with a hoe and it is fun to use once you get some skill in
using it. We bought a plow attachment from the Leirmans catalog that fits the
wheel hoe and found it to be a very handy attachment for hilling corn, beans,
and potatoes. Well worth the investment.
For problem areas where the grass and weeds are getting a foothold at the edge
of your garden the weedeater is a handy tool to recover from an invasion.
Position the weedeater to scalp the ground (cut right down to the dirt) and
you can save yourself a lot of work with the weed hoe. The weedeater is an
essential tool for maintaining an electric fence and handy in the garden when
things get out of hand. It uses very little gas and by using a thick fishing
line type string is pretty safe to use. Be sure to use eye protection whenever
you use the weedeater but especially when you scalp the edges. Use ear
protection with all engine operated tools.
Squash and cucumbers were all protected under ground when the frost hit, so
they appear to be ok. The are just starting to come up now. If the beans come
up in good stands and do not need to be replanted (and there are no more
frost) then the only planting left to do is to transplant the tomatoes,
peppers, and eggplants from the cold frame.
Weeding and setting up to be away for a week or so will be the focus of
activity this week. I will also be finishing up some jobs for pay to have some
extra cash for the trip. Landscaping and cutting a path though the forest for
a new electric fence for a neighbor will be the off farm work this week.
The only real set back so far this spring is the brocolli. Even though the
giant red mustard did a good job of attacting the flea beetles to itself
instead of the to the brocolli, the brocolli did suffer to the extent that it
may not be able to recover from the damage. Next year, I will set out 2 rows
(on either side of the brocolli) of mustard to attact the flea beetles and sow
the brocolli thicker. To insure some brocolli for this summer I bought a few
(16) transplants and hope that some of the 75 foot row of brocolli direct
seedings will recover.
To search for a topic, click on the find button of your
browser. It may Listed as Find or Find on this page. On netscape navigator it is listed under the Edit section as Find on Page (Control F) or Find Again. This is a very powerful function and is well worth using.
You can look for a specific date in the form of dd-mm-yy , so you could search for
all March dates by looking for 03- or April by searching for 04-.
You can search for any references to a topic you might be interested in. For example, you could search for all references to carrots, potato, beets, peas, gardens,
electric, wood, etc. Once you find a reference, be sure to click on next or find next to see the next entry. By this method you can follow a references to a topic throughout the seasons. You might search tomato and follow the tomoto from starting transplants to storage. Using the Find (or search this document) function of your browser, this document is fully searchable. This is nothing fancy but highly useful.
[Return to Beginning - To Begin Any Search]
=[Return To Affluent Peasant Home Page]=
This Journal Is Dedicated To My Mother
Bernice
I was writing letters to my mother to keep her informed of life in the woods. It was her enthuiastic response to those letters that lead to the idea of sharing a journal with those who might be interested in the day to day life of living and working on the land.
Many times, especially when it was hard to find time during busy seasons, it was knowing that she was waiting for the next journal entry that helped keep this journal going.
Thanks, Mom For Your Support And Encouragement.
[ Return To Journal ]